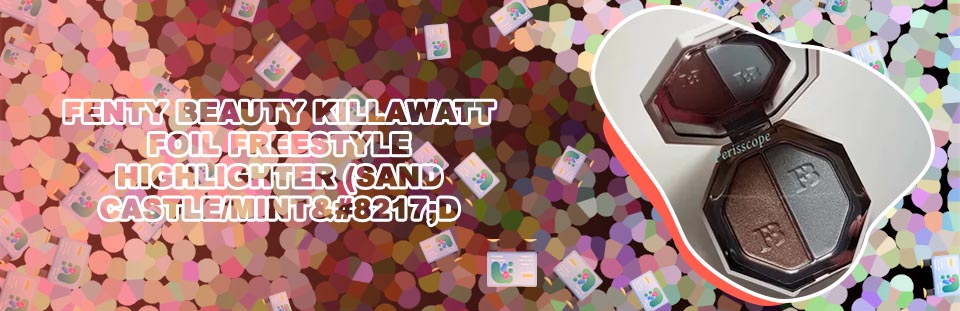
Killawatt foil
When it comes to achieving the perfect Killawatt foil, there are several key factors to consider. From choosing the right products to mastering the application technique, getting that flawless foil finish requires a combination of skill and knowledge. To help you on your quest for the ultimate foil look, we have curated a list of 4 articles that will provide you with the tips and tricks you need to succeed.
How to Choose the Best Foil for Your Killawatt Look
Today we are going to discuss the importance of choosing the right foil for your Killawatt look. We have with us an expert in the field, makeup artist Sarah Johnson.
Sarah, can you tell us why choosing the right foil is so important when creating a Killawatt look?
Sarah: Absolutely! The right foil can make all the difference when it comes to achieving that perfect Killawatt glow. Foils come in different shades and finishes, so it's important to choose one that complements your skin tone and the look you are going for.
What are some tips you can give our audience when selecting a foil for their Killawatt look?
Sarah: One important tip is to consider your skin tone. For lighter skin tones, a champagne or rose gold foil works best, while deeper skin tones can opt for a bronze or copper foil. It's also important to consider the finish of the foil - whether you want a subtle shimmer or a more intense metallic effect.
Why do you think readers should pay attention to this aspect of their makeup routine?
Sarah: The right foil can take your Killawatt look to the next level, adding dimension and luminosity to your makeup. It's a simple yet effective way to enhance your features and create a stunning makeup look
The Ultimate Guide to Applying Foil for a Flawless Finish
Achieving a flawless finish with foil can seem like a daunting task, but with the right techniques and tools, it can be easily accomplished. This comprehensive guide provides step-by-step instructions on how to apply foil for a perfect finish every time.
One of the key tips highlighted in this guide is the importance of preparing the hair properly before applying foil. This includes sectioning the hair neatly and making sure it is free of tangles. Additionally, the guide emphasizes the need for using the right type of foil and ensuring it is folded correctly to prevent slippage.
The guide also covers different application techniques, such as weaving, slicing, and balayage, to achieve various looks and effects. It provides detailed instructions on how to execute each technique effectively, ensuring a professional result.
Overall, this guide is a valuable resource for both beginners and experienced stylists looking to improve their foil application skills. By following the tips and techniques outlined in this guide, anyone can achieve a flawless finish with foil.
In order to better understand the content of this guide, readers should pay attention to the recommended foil types and folding techniques for optimal results. Additionally, exploring different application techniques such as weaving and slicing can help expand one's styling repertoire. Finally, practicing on a mannequin or with a fellow
Top Tips for Maintaining Your Killawatt Foil
Maintaining your Killawatt Foil is crucial to ensure its longevity and optimal performance. Here are some expert tips to help you keep your foil in top condition.
Firstly, it is important to regularly clean your Killawatt Foil after each use. Use a mild soap and water to gently remove any dirt or residue that may have accumulated on the foil. Avoid using harsh chemicals or abrasive materials, as they can damage the foil's surface.
Secondly, make sure to store your Killawatt Foil properly when not in use. Keep it in a cool, dry place away from direct sunlight and moisture. This will help prevent any warping or corrosion of the foil over time.
Additionally, it is recommended to regularly inspect your foil for any signs of wear and tear. Check for any dents, scratches, or other damage that may affect the foil's performance. If you notice any issues, address them promptly to prevent further damage.
By following these simple tips, you can ensure that your Killawatt Foil remains in excellent condition for years to come, allowing you to enjoy your foiling adventures to the fullest.
Achieving the Perfect Killawatt Foil: Expert Advice and Techniques
When it comes to creating the perfect killawatt foil, expert advice and techniques can make all the difference. Achieving that stunning, reflective finish requires a combination of skill, precision, and the right tools. By following these expert tips, you can elevate your foil game to the next level.
First and foremost, choosing the right foil is crucial. Look for a high-quality, ultra-reflective foil that will give you that coveted killawatt shine. Next, make sure your application technique is on point. Use a light hand and take your time to ensure even coverage. Layering multiple thin coats will help you achieve a more intense and long-lasting foil effect.
Another key tip is to prep your nails properly before applying the foil. Start with a clean, dry nail surface and use a good quality base coat to create a smooth canvas for the foil. Once you've applied the foil, seal it in with a top coat to protect the finish and make it last.
Overall, achieving the perfect killawatt foil is a combination of quality products, expert techniques, and attention to detail. By following these tips, you can create stunning, eye-catching foil nails that will turn heads wherever you go.